Today, we are showing you how to make a variety of scrunchies! You can make just a scrunchy, a scrunchy with a scarf, or a scrunchy with a bow. This is a great beginner sewing project and does not take much material or time.

Today, we are showing you how to make a variety of scrunchies! You can make just a scrunchy, a scrunchy with a scarf, or a scrunchy with a bow. This is a great beginner sewing project and does not take much material or time.
Celebrate Canada Day and add some decorations with our easy to make Canada Day Bunting. This is a fun project to get the kids involved with. Let them create some bows and ribbon to add onto the flags.

Mastering an exposed zipper is critical in finishing your garments and making them look professional. A lot of people are intimidated by zippers but once you get the hang of it you will be cruising through them!
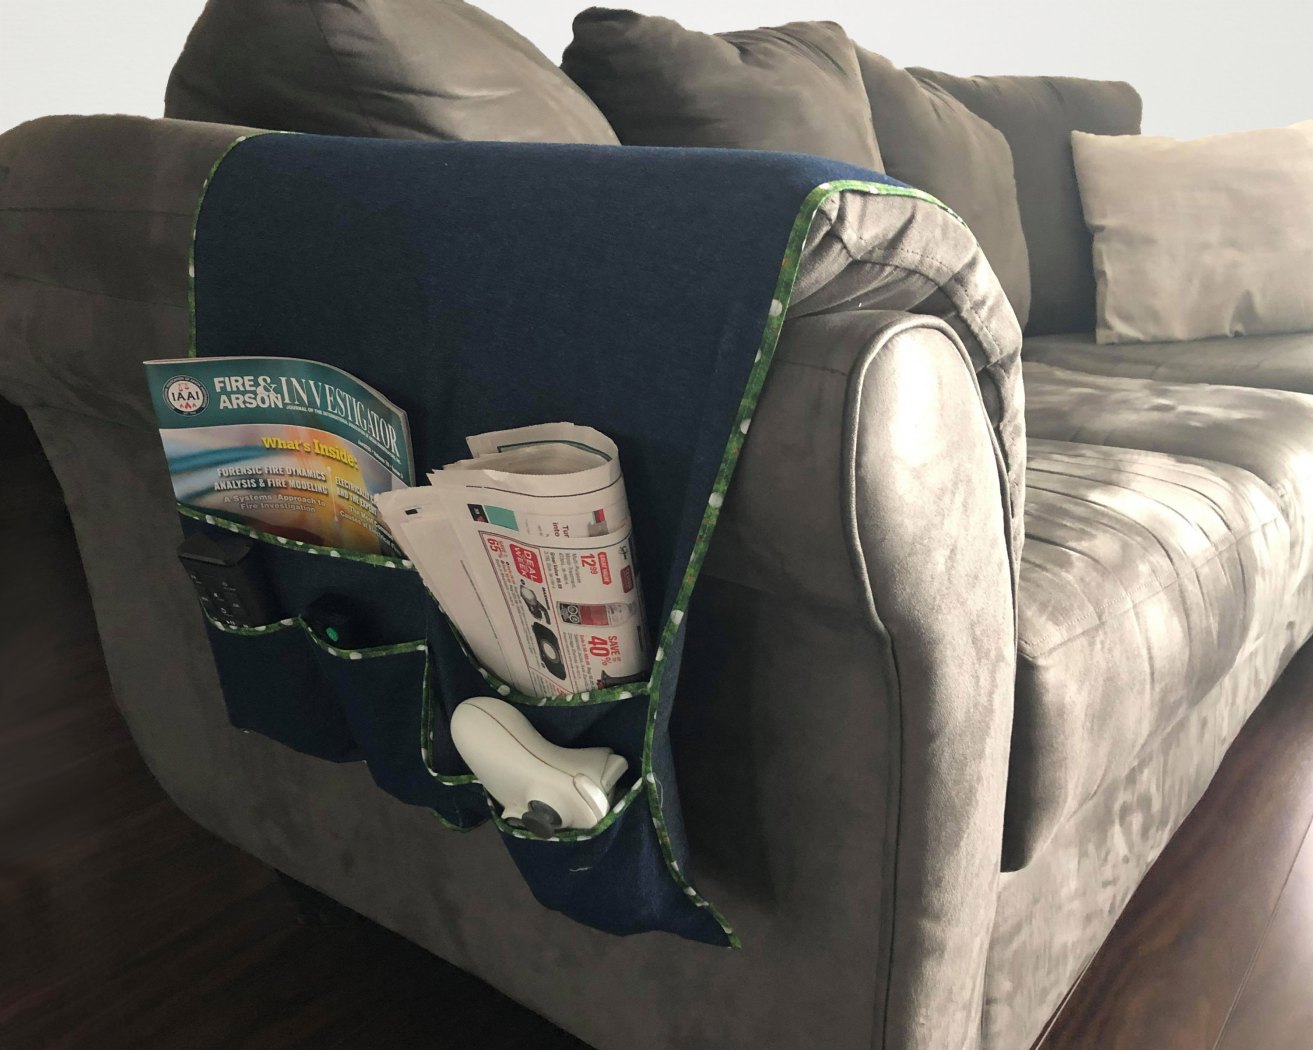
(more…)Father’s Day is sneaking up on us and the best gifts are handmade! Make dad a handy sofa caddy so he can store the remotes and his magazines. Make it match to the room or dress it up with some prints that remind you of dad.

*Always refer to your machine manual for sewing buttonholes. Every machine is different and might require different steps.*


2. Line up your drawn line with the dot at the bottom of your buttonhole foot. Adjust your slider until it reaches the top line. This is where your buttonhole will start. This length will determine the length of your buttonhole.
**Some machines may have a buttonhole foot that requires you to but the button in the back to determine the length. If you have this foot you can ignore this step.**

3. Set your stitch length an tension. We set our machine to our buttonhole option. You may need to adjust your tension after doing your practice buttonhole.


4. Attach your foot to your machine and line-up with your markings. Stitch as per the instructions in your machine manual.


5. Snip away any loose threads. Insert a pin at the top of your buttonhole. Pierce through the bottom of your buttonhole moving up until you meet the pin. Be very carfeul not to cut through your threads.


2. Set your machine to a zigzag stitch and slowly turn the wheel to see if you have the correct stitch width. Set your stitch length to 0. Start with the two back button holes and then the front buttons.


3. Pull your threads and sew 10 stitches. If you are doing a 2 hole button you are done, if you are doing a 4 hole button lift your foot and reposition for the remaining holes.


4. Pull your threads to the back, tie and trim away your excess thread.
